
Applying Adhesive Vinyl: 3 Steps to Success
New to vinyl? No problem! I am going to break down how to apply adhesive vinyl into 3 easy steps, and after we're done, you're going to be able to add "applies vinyl like a boss" to your crafting resume. ;)
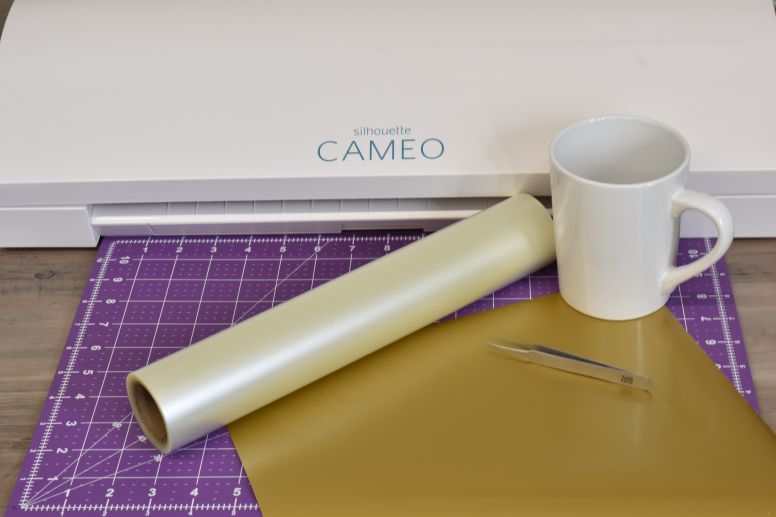
Before we jump on in, here's what you're going to need to get started:
- Adhesive Vinyl: Any type will work that has a paper backing. You don't want to accidentally use heat transfer vinyl (HTV).
- Cutting machine: Now you can use scissors, die cutter or an Xacto knife to manually cut the vinyl, but man oh man, having a cutting machine like the Silhouette Cameo (my personal fave) or Cricut Explore will make this a far more enjoyable experience!
- Weeding Tool: I use/recommend either a Siser Weeder or a pair of super-fine tipped tweezers.
- Transfer Tape: NOT ALL TAPES ARE CREATED EQUAL! Yes, in a pinch contact-paper from the dollar store can be made to work, but do yourself a favor and pick up a roll of our transfer tape when you can. We have tested literally dozens of varieties of transfer tape and after hours of trial and error, we found 3 different tapes that never fail! Clear, gridlined or paper, they all will get the job done.
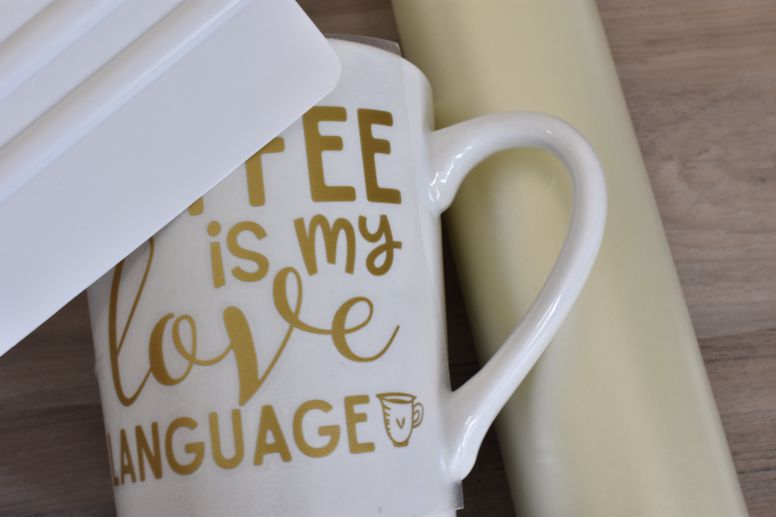
- Something to put your vinyl on: This is the best part about vinyl, the world is your oyster! If it is smooth and solid, it is begging to be customized. I personally am a big fan of blank coffee mugs at the dollar store.
Ok, let's get started!
#1 Cut Your Vinyl
Ok, ok, I know that this seems a little obvious, but it can actually be the step that keeps people from moving forward! When cutting adhesive vinyl, the goal is to not cut all the way through the paper backing. You only want to cut the vinyl. Buuuut, you don't want your blade to cut to shallow either, then it becomes a weeding nightmare, which (in my case) leads to a little temper tantrum and a need to walk away for a bit. So what we have here is a little "Goldilocks' porridge" situation...can't be to too hot or cold, it needs to be just right.
Typically most electronic cutting machines on the market today have vinyl presets, and about 90% of the time they work great...the other 10% of the time it can be VERY frustrating. So to save yourself the headache, ALWAYS DO A TEST CUT! (All of Standout Vinyl's products have recommended cut settings and application instructions in the product description.)

With adhesive vinyl, you want to load your vinyl paper-side down like I did in the image above. You can also see that I just load my vinyl straight into my machine. Personally, I find cutting mats to be a huge pain in my tooshie :) The key to success with cutting without a mat is to make sure you move your right-hand roller guide in to the middle notch (if using a Cameo). Bringing the guide in helps keep the vinyl from wiggling all over.
#2 Weeding
Weeding is a term you will hear often when working with vinyl. And just like you weed a garden to remove the unwanted plants, weeding vinyl is simply removing the unwanted pieces around your design. Easy Peasy.


Personally, I find weeding relaxing. Post up with some music and just zone the world out...well, at least until I hear "mom, mom, mom...."
#3 Use Transfer Tape and Apply Vinyl
Transfer tape will become your very best friend. Like I stated earlier, they are not all the same, and some work better than others. Ideally, you want it to be tacky enough to pull the vinyl from the paper backing but still able to release onto your desired surface. For this to work, the vinyl has to have a stronger adhesive than the tape...plus, you don't want the transfer tape leaving any residue behind on the vinyl that you then have to go back and clean. Ain't nobody got time for that! ;
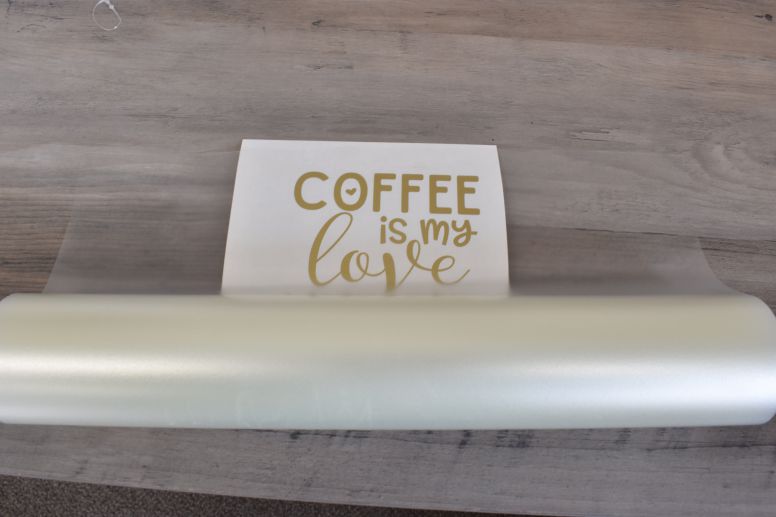
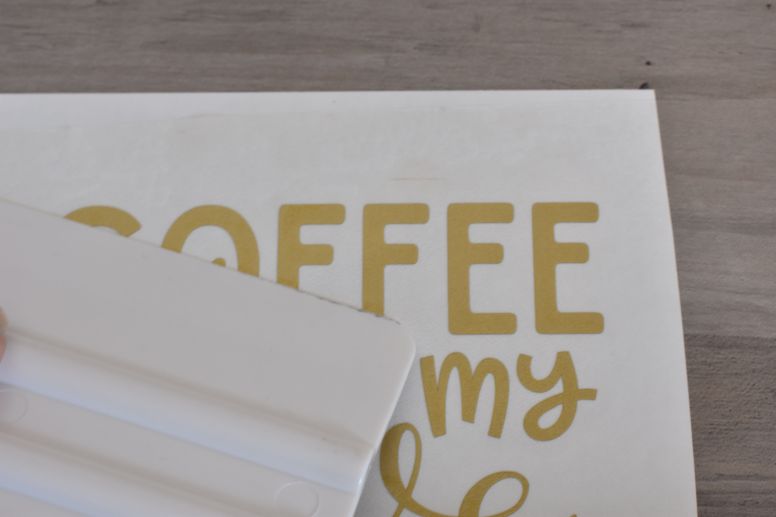
Once the transfer tape is applied over the vinyl, use an application tool to adhere it to the vinyl and remove any air bubbles.
It's hard to tell in this image, but there is transfer tape over the vinyl.
Then starting in one corner, pull downwards at an angle to remove the vinyl from the carrier sheet.

Place it on your surface, pressing the center of the design down first and then moving outward. This will help push out any little air bubbles.
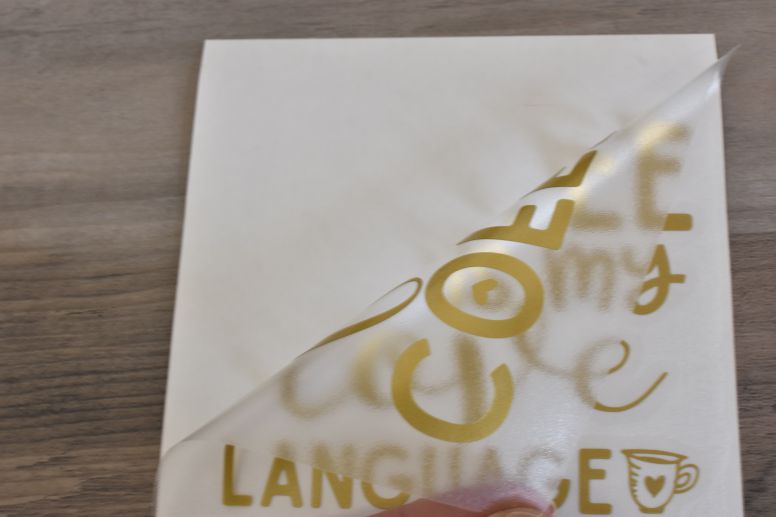
Once the vinyl is securely in place, start with a corner of the transfer tape and slowly pull downwards at an angle to remove it. The vinyl will stay exactly where you put it...for better or worse...Make sure you are happy with its position before you place it on your surface, you cannot pull it up and move it around, it will get all stretched out and be a big mess!

How fun is this coffee cup! (The cut file can be found over at the Silhouette School Blog.) In just 5 minutes and for less that $2 we have a custom cup that just makes me smile. If you follow these 3 steps you'll have success with adhesive vinyl every time!